- AI Fire
- Posts
- 📼 Completed Guide to RunwayML: Mastering Video Generation | Part 2
📼 Completed Guide to RunwayML: Mastering Video Generation | Part 2
Complete RunwayML Video Guide: Easy Steps to Create Amazing AI Videos
Elara Nguyen
November 05, 2023

Table of Contents
Imagine having a magic art tool that lets you create like never before. That's RunwayML! It's a special tool that helps artists and designers use the latest computer tricks without being tech professionals. With RunwayML, making cool digital art becomes a breeze. It's like having a helpful friend who knows both art and computers really well.

Creating the whole world with RunwayML
Contents at part 1
Introduction
Getting Started with RunwayML
Quick Mention: Image Generation with RunwayML
Generating Video with RunwayML
Some Important Features of Video Generation

An image generated by RunwayML
VI. More than just Image Generation - Advanced Features
1. Remove Background
The Remove Background feature, an upgraded version of the Green Screen tool, lets you easily separate objects, people, or anything else from a video clip. Traditional green-screen methods in post-production often need you to go through each frame and outline objects by hand which takes a lot of time. With Runway, you can make professional-looking masks and remove objects from videos quickly with just a few clicks.
First step, you need to choose “Edit Videos” on the left mainboard sidebar.

Next, you need to choose “Remove Background”

Your video should be uploaded here so RunwayML can help with editing it.

After uploading your video, you'll need to make a mask to decide which parts are not the background. Start by clicking on the main part of the subject in your clip.
We will use this video as an example.
If you want to separate the girl and the background, let’s mark the point around her, starting from the main part is the neck.
When you're working on your subject and want to cover more areas, keep clicking until the mask meets your needs. If there’s too much selected, switch to the Exclude option on the sidebar to take away unwanted parts. The '1' and '2' keys on your keyboard make it easy to flip between adding or subtracting from your mask

The first click you make on your clip sets a keyframe, which is a starting point for the mask to follow through the video. After you've set this up, press Preview to check the whole video. Look out for any spots you might have missed and add more keyframes as needed to adjust the mask.

If your video has a lot of details and you need to be more precise, pick the Brush tool from the sidebar. It lets you paint over complex areas carefully. To do this with more accuracy, zoom in with the '+' key and zoom out with the '-' key. The changes you make will affect the next frames automatically.
For an even clearer view of what you're doing, try the different viewing tools like Overlay, Preview, or Alpha Channel modes found under the View section in the sidebar. The Transparency option in the Overlay view is particularly useful to clearly see the changes you’re making to your mask.

Once your clip looks perfect, you have two choices: export it right away or keep editing by adding it to the timeline to include more effects.
To export, click Export Mask in the top right corner. A window with options will pop up. Here, you can pick a new Background Color, select the file Format (like MP4 or ProRes), and more. After making your choices and hitting Export Mask, your video will start exporting to Assets. Plus, if you've got email alerts, you’ll get an email when it’s all done.

Here is your resulting video.
2. Inpainting
Inpainting is a cutting-edge video tool that automatically erases unwanted objects from your clip. What used to take professionals hours or days can now be done quickly and easily, thanks to artificial intelligence. This makes the process more user-friendly, cost-effective, and readily available for your projects.

Choosing the right clips to import is key to getting great results: avoid low-quality clips or ones where the subject moves in and out of the frame a lot. Also, make sure your subject doesn't fill up most of the frame; Inpainting needs some background to work well!
We will use this video about beautiful scenery as an example.
This is the interface after you import the video to RunwayML

Start by using the brush to paint over the item you want to remove, which creates a mask. You can change the brush size in the Controls panel to the right.
Once you're satisfied with your mask, click Preview and watch the clip all the way through to spot any imperfections. Add more keyframes if you need to, using the Mode option from the right panel to refine your mask. It's best to do this step by step, and only if necessary.
If you want to remove the man from the frame, you should use the brush and paint over him.

Here is your result video after a few clicks.
If you want to keep working on your Inpainted video in the Project, just click on Done Inpainting to access our comprehensive editor.

To edit your Inpainted clip again, just open your project, choose the clip from the timeline (it will highlight), and head over to the AI Magic Tools in the right-hand Clip section. There, you'll find the tool you used and an Edit Inpainting button to make changes.

Learn How to Make AI Work For You!
Transform your AI skills with the AI Fire Academy Premium Plan – FREE for 14 days! Gain instant access to 100+ AI workflows, advanced tutorials, exclusive case studies, and unbeatable discounts. No risks, cancel anytime.
3. Super-Slow Motion
The Super-Slow Motion feature in RunwayML lets you turn normal videos into smooth slow-motion clips quickly. Doing this the usual way can take a lot of time, but with RunwayML, you can get it done much faster without needing special cameras or editing each frame by hand.

For example, we will use the slow-motion for this dolphin video.
Once you've uploaded your video, adjust the speed to your preference using the Speed adjustment slider. Then hit Process to see your video at the new, slower speed.

To check how the changes look compared to the original, just click on Toggle to original. If the speed isn't quite right, move the speed slider until you're satisfied, and then hit Process once more.

Here is the resulting video with 0.5 Speed.
4. Extract Depth
The Extract Depth tool in RunwayML allows you to create a depth map from a video clip easily. A depth map is a visual representation of how far away objects are in your video.

As usual, you'll need to upload your clip. You can drag and drop your clips directly from your computer into Runway, or choose from the Assets Section.
We will generate an extract-depth version of this forest video for example.
After clicking on the button “Process” within a second, a depth map preview will appear on-screen. Hit the play icon to view how the depth map changes throughout the video. You can make some changes to the original video to increase the quality of the extract-depth video
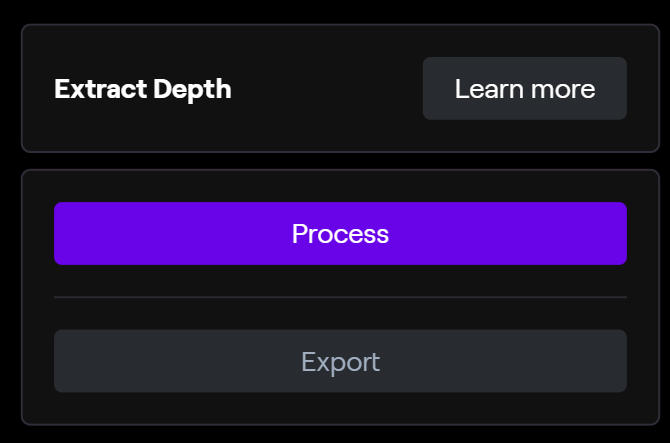
Once satisfied with your depth map, select Export to process and save the finished clip!
There are some more advanced features of editing video of RunwayML. For more information and deeper insight, you can check out here!
VII. Tips for prompting better
To create more beautiful scenes, more suitable to your needs, here are some tips for you to make RunwayML understand you better:
Be Specific in Your Prompts: Use detailed descriptions in your prompts. The more specific you are, the better the results are!
Use the Preview Option: Make use of the preview function to test out your prompts before committing to processing the entire video so you don’t have to waste your time generating multiple times
Adjust Settings Gradually: Make small changes to settings and see how they affect your output, rather than making big adjustments all at once
Specify the style: Use keywords like "realistic," "animated," or "oil painting style."
Camera movement: Mention if you want "panning," "tracking shot," or "zoom-in."
Scene layout: Describe what's in front, middle, or back, like a "close-up of a cat."
Editing preferences: Say if you want "cuts," "transitions," or "slow motion effects
Using Emojis: You can also try to use emojis in your prompt like 🕊️☀️😽
VIII. Application of RunwayML
RunwayML has various applications across different creative and technical fields. Here are some
Video Editing: RunwayML enables users to edit videos without professional editing skills or software.
Content Creation: Content creators for social media, YouTube, and other platforms can use RunwayML to generate and edit videos quickly, helping them meet the demand for high-quality content.
Film Production: Independent filmmakers can use RunwayML's video generation and editing features to create films with limited resources, using AI to assist in areas like background generation and compositing.
Marketing and Advertising: Marketers can generate promotional videos, edit faster, and create product demos using RunwayML, making the content creation process more efficient.
Educational Materials: Educators can create instructional videos with enhanced visuals, animations, and effects to better engage students and illustrate complex concepts.
Gaming and Virtual Reality: Game designers and VR developers can use RunwayML to generate textures, design characters, and create immersive environments.
Art: Artists can explore new forms of digital art by using RunwayML’s AI to alter and create new pieces, pushing the boundaries of traditional media.
XI. RunwayML Updating
RunwayML has not only the website version but also the mobile version on iOS. This version is for mobile users can now access advanced video generation and editing tools right from their devices. However, there are a few limitations to the mobile version of RunwayML. For example, it does not support all of the AI models and features that are available in the desktop version. Additionally, the mobile version may not be as powerful as the desktop version, so it may take longer to render complex projects. In conclusion, the mobile version is very convenient and potential to be a game-changer in the future!

One more thing to note, Gen 2 of RunwayML is still under development. Recently, on the second of November, RunwayML announced that they have released an update for both “text to video” and “image to video” generation with Gen-2, bringing major improvements to both the fidelity and consistency of video results and adjusting an impressive video to prove that. You can check the announcement here
X. Conclusion
RunwayML is a powerful platform for video editing, offering a range of AI-powered tools that make complex editing tasks simpler. It’s a great resource for both professionals and non-tech people alike, and with its latest features, it’s becoming a go-to solution in video production.
Get started with RunwayML today and take your video projects to the next level!
For more details on how to use RunwayML, please check here
If you are interested in other topics and how AI is transforming different aspects of our lives, or even in making money using AI with more detailed, step-by-step guidance, you can find our other articles here:
*indicates a premium content, if any
Overall, how would you rate the AI Fire 101 Series? |
Reply